It’s 2022, so many of us now have 2 years experience of online meetings. My experience is that the better that I can see and hear someone in an online call, the more natural the conversation feels. Put another way, I think one does a courtesy to the other person by improving the quality of how you appear in a video call.
Unfortunately, most webcams are terrible cameras that take terrible pictures. The market for decent quality webcams seems to be non-existent, with the available choices seeming to sit somewhere between bad and mediocre. Laptop webcams have the additional problem that thin lids mean that the camera is fighting a losing battle against physics1 that software can only partly overcome.
Fortunately there is a solution: you can use a “proper” camera, of the sort you associate with earnest tourists, as a webcam. In particular, most modern mirrorless cameras from the last few years can do an excellent job if you know what you’re doing.
To give you an idea of the difference, here’s the output of the most widely used webcam, the Logitech C920, and the Fujifilm X-S10 I use as a webcam:
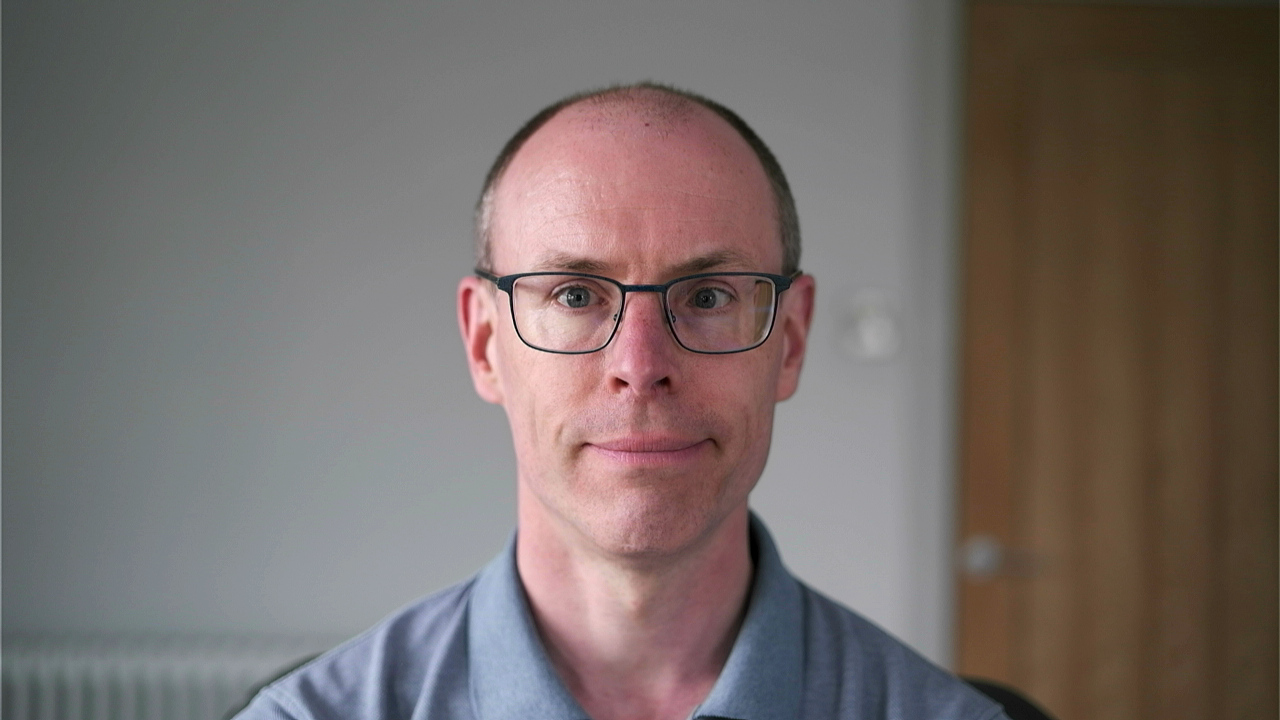
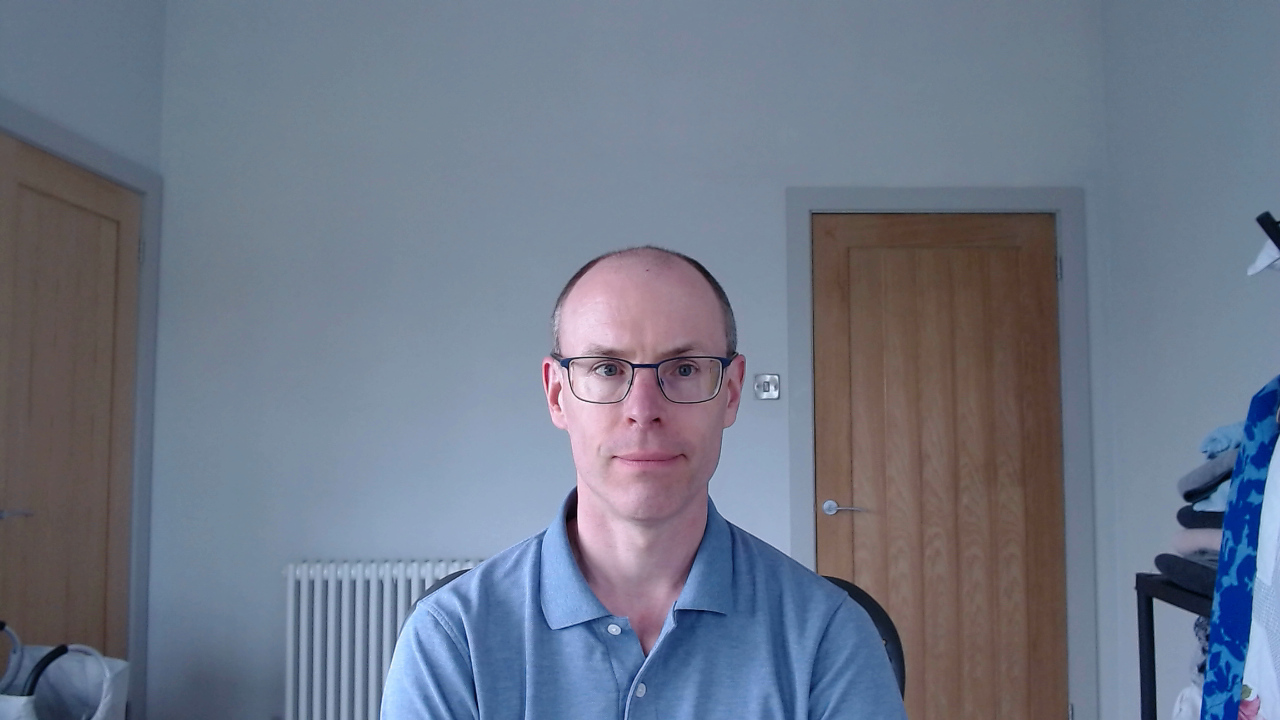
I took these photos in daylight within a couple of minutes each other at almost identical positions: the C920 is about half an inch closer to me than the X-S10 was. The difference between them is stark. The C920 captures far too wide a picture of my “office”, showing you elements of the room I’d rather didn’t trouble you, including the background (do you really need to see the light switch in detail?!). It also makes everything too bright with a blue-ish tinge — my walls aren’t that white and I’m not that pale. Finally there’s only a small amount of detail to my face — I’m a sort of pinkish-with-blue-tinges2 semi-smudge. In contrast, the X-S10 zooms in to just my face and shoulders; my skin has a natural (and fairly accurate) colour; retains as much detail on my face as 720p can express; and naturally blurs the background (the light switch is now almost invisible).
At nighttime (OK, OK, I just closed the curtains!), with two normal lights on, the differences are magnified. The C920 loses what little definition it had to my face, which is now very smudged. In contrast, the X-S10 still produces an excellent quality picture:
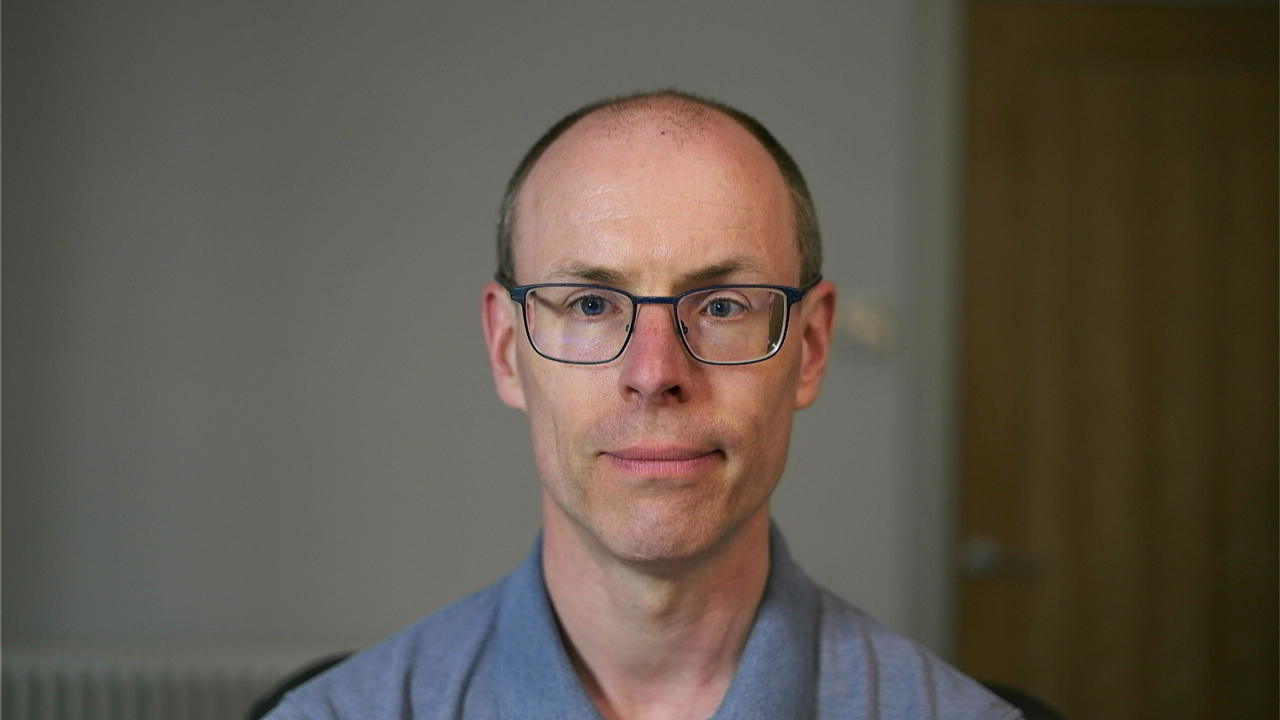

Of course, neither of the examples above looks like a classical portrait photo. I’ve deliberately taken the output of both the C920 and X-S10 as webcams in 720p3, which is much better than the default webcam standard of 360p, but is still too low-res to really show off the X-S10. But, still, if you were unlucky enough to have to spend an hour staring at a screen with my ugly mug in it, I’m pretty sure you’d find it a better experience with the X-S10 footage.
Unfortunately, photography can be an overwhelming topic if you’re unfamiliar with it, and working out what works and what doesn’t can be difficult. I’m going to try and define some simple rules of thumb about what sorts of camera equipment will work well. If you know what you’re doing, you can break some or all of these rules, but if you know that, then you don’t need to read this post!
Some recommendations
I’m going to start with some concrete recommendations from myself and other people (note: none of the links in this blog post are affiliate links: and I don’t make money from them). Camera equipment can be eye wateringly expensive new. That said, even new, you can buy decent options for £600 and amazing options (that are also state-of-the-art photography cameras) for under £1300: neither option is exactly cheap, but it’s not beyond the budget of many folk who work from home. Furthermore, and contrary to people’s expectations, most cameras and lenses are designed to take a surprising amount of abuse, so you can often get second hand equipment in perfect working order at a substantial discount4.
With that in mind here are some recommendations (and anti-recommendations) from people I trust:
- The most frequently reported option I’ve seen is to use a member of the Sony A6*000 family. The older A6000 is readily and cheaply available; the A6400 seems to be slightly better as a webcam; though the A6600’s extra features are probably only useful for general photography. I’ve heard more than once that the A6*000 family come with mediocre kit lenses (see later for an explanation) but that lenses like the Sony E 35mm f/1.8 OSS work well for webcams.
- I use a Fujifilm X-S10 camera, a Fujinon XF33mm f/1.4 lens, and a cheap HDMI to USB capture card. The XF33mm is a wonderful photography lens, but expensive; judging by the reviews, most people would probably be happy with the much cheaper Sigma 30mm f/1.4. Used only as a webcam, I expect the two lenses to be virtually indistinguishable. As of today, an X-S10 body + Sigma 30mm + capture card (all new) comes in at under £1300.
- Dan Luu used to use an old Sony A7S but it has poor autofocus and he would now recommend a Sony A6000 (about £400 new) as a good compromise between price and performance. He notes that the cheap HDMI to USB capture card I use has lower latency than the (more sophisticated) Elgato Cam Link 4K he uses provided your camera outputs 720p or 1080p (my camera does; Dan’s newer camera, surprisingly, doesn’t). Lower latency is useful on webcams, as videocon software doesn’t correct for latency.
- Chris Seaton uses a reasonably priced Sony ZV-1 (£700 new) which he notes works well provided that you enable PC Remote mode (without that, if the ZV-1 is turned on with USB already connected it starts in mass storage mode i.e. it pretends to be a USB memory stick!).
In the rest of this post, I’m going to try and explain a bit more about all the magic numbers you see above. If you’re unsure about the above options, this will hopefully allow you to find the right equipment, at the right price, for your needs. I’ll try and be as terse as possible but, unfortunately, photography has quite a lot of variables.
Camera
You want a “mirrorless” camera, not a “DSLR”. Mirrorless cameras are smaller and lighter and have almost entirely replaced DSLRs.
Cameras then come in various “sensor sizes” (i.e. the bit that converts light into a digital signal). Unfortunately, these have silly and misleading names, so from smallest to largest: micro four thirds, APS-C, full frame, medium format. There are various trade-offs with each, but I recommend APS-C, which also happens to be the most commonly available; micro four thirds was a common choice once, and has some advantages for video, but is now in decline; and you need to be a serious photographer to make good use of full frame or medium format. Perhaps surprisingly, photography cameras are slightly less obsessed about megapixel counts than mobile phone cameras but it doesn’t matter for webcams: any moderately recent camera has far more megapixels than it can make use of as a webcam.
Unfortunately, the choice of sensor size also has an effect on the interpretation of lens focal length and aperture size. In this post, I’m going to quote only APS-C numbers, so if you want a different sensor size you’ll need to convert them appropriately5.
Lens
Cameras come as a “body only” (i.e. without a lens) or with a “kit lens”. Most kit lenses are pretty bad. My X-S10 came with the XF18-55mm which is renowned as one of the best kit lenses around — but I’d say it’s OK at best. In general, I’d recommend buying a camera as a body and then buying one or two lenses afterwards.
Lenses are either “prime” or “zoom” lenses. Zoom lenses, as the name suggests, zoom in and out; prime lenses cannot zoom. Zoom lenses might sound superior, but they sacrifice other properties, most obviously image quality, but also aperture size (which we’ll come to shortly). I prefer to use a prime lens for my webcam, though if you’re starting out, a zoom lens allows you to experiment more easily.
Some lenses come with a stabilisation mechanism to correct for the shake of the human hand. You don’t need a stabilisation mechanism for a webcam because your camera will be statically mounted.
After deciding between a prime or zoom lens, there are two further major factors: focal length; and aperture size.
Focal length
The focal length is, informally, how “zoomed in or out” the lens is. Short focal lengths (e.g. 18mm) are zoomed out (think a photo of a mountain) and long focal lengths (e.g. 150mm) are zoomed in (think a photo of a bird). Translated to an APS-C camera, our eye’s focal length is roughly 35mm. Too-short focal lengths distort faces in unpleasant ways (in particular, making noses look like they’ve lost a battle with a spade). Long focal lengths make us look thinner, which many people find flattering, but too-long focal lengths are impractical in an indoor setting.
Roughly speaking, APS-C lenses in the 27-35mm range are likely to be the best choices for a webcam. Your choice of the lower or upper end will be partly dictated by how far you mount the camera from your face and how much of your body you want in view. Personally, I like my shoulders and head to be visible; some people prefer a more zoomed out look. My camera is 1 metre away from my face, and so 35mm is just slightly too zoomed in: if I move too much I fall out of the frame. For me 33mm, is a good compromise, and 30mm would probably be OK too, but 27mm would mean I couldn’t mount the camera above my monitor without that appearing in the frame. If you’re unsure, it can be safer to start with a zoom lens, and then experiment until you find the focal length you’re happy with.
Aperture size
The aperture size determines how much light a lens lets in, with the size quoted as an “f-stop”. All lenses you’ll ever encounter allow you to change the aperture size, so what’s quoted is the widest size the aperture will open to. From our perspective, we want a wide aperture which, confusingly, means a smaller f-stop number. f-stops use a logarithmic scale, so these numbers each represent a halving of the aperture over the previous value: f/1.0 (widest aperture), f/1.4, f/2.0, f/2.8, f/4.0 (narrowest aperture).
A wider aperture lets in more light which is perfect for low-light conditions, which are common indoors6. However, a wide aperture means that less of the image is in focus. Fortunately, that’s perfect for us, as it means that we get a naturally (and, with a decent lens, pleasantly) “blurred background” (or, in photography lingo, “bokeh”) as a privacy aid for free! Modern cameras have excellent human auto-focus (they lock onto eyes well), which means that they deal well with wide apertures. Wider apertures also tend to lead to “softer”, less detailed images, but at the resolution of a video call, this is unnoticeable.
I suggest aiming for at least an f/2.8 lens, but preferably f/2.0-f/1.4, as the ability to work well in low light and to blur the background are both big advantages for webcam use. My preferred lens is f/1.4; f/2.8 (which lets in one quarter the light of f/1.4) is about as narrow an aperture as I can go in my sometimes poorly lit office before image quality suffers. However, note that, in general, the wider the aperture, the more expensive the lens is to make; an f/1.4 lens, for example, is often substantially more expensive than a f/2 lens.
Autofocus and focus breathing
Lenses are either “manual focus” or “autofocus”. You want an autofocus lens. As a lens changes focus to follow your movements, it can “breath”, that is zoom slightly in or out. For static photography, this doesn’t matter, but in video “breathing” is distracting. It is worth quickly reading a review or two for your lens, as they invariably describe whether the lens does or doesn’t breath. Increasingly, modern lenses are made with video in mind, and so “breathing” is becoming less common.
Mount
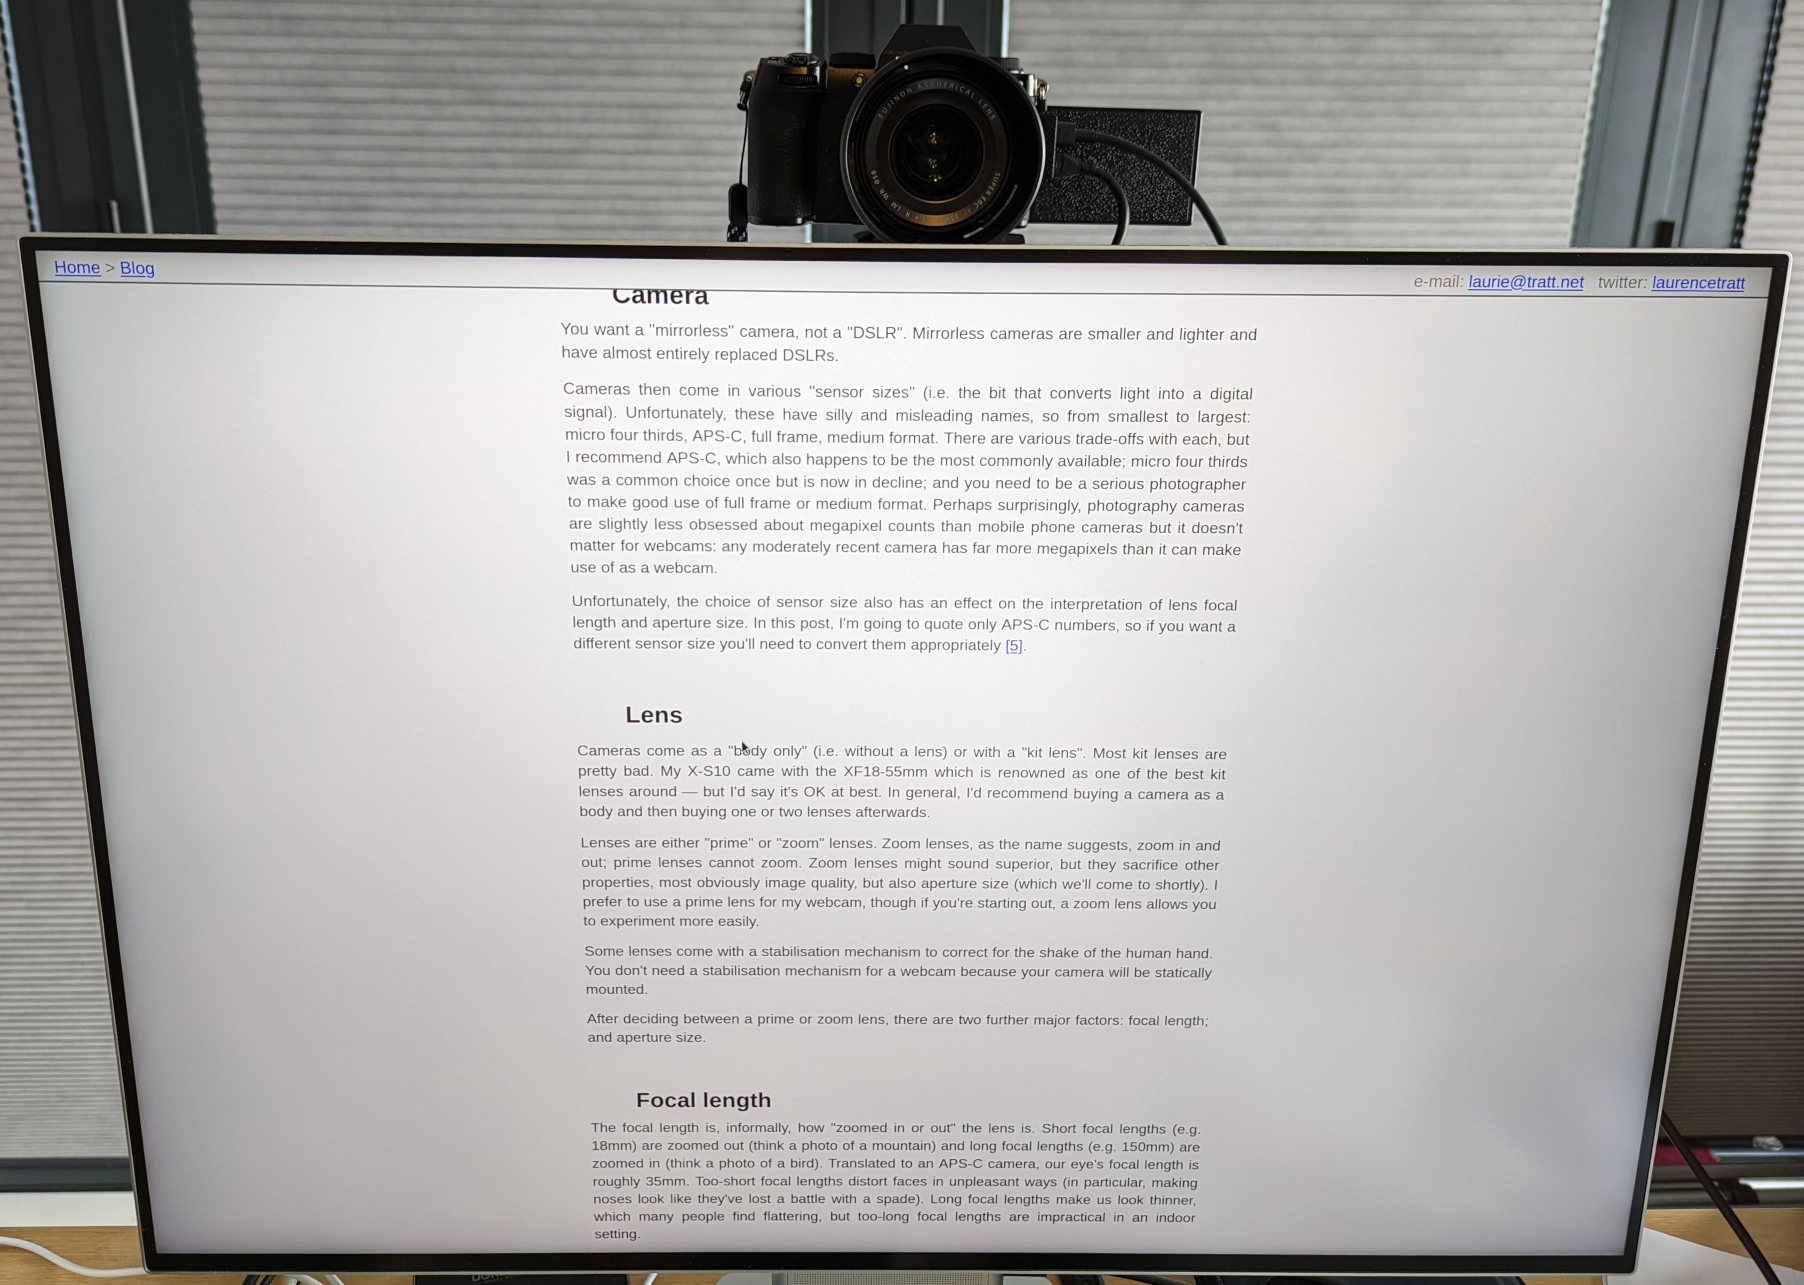
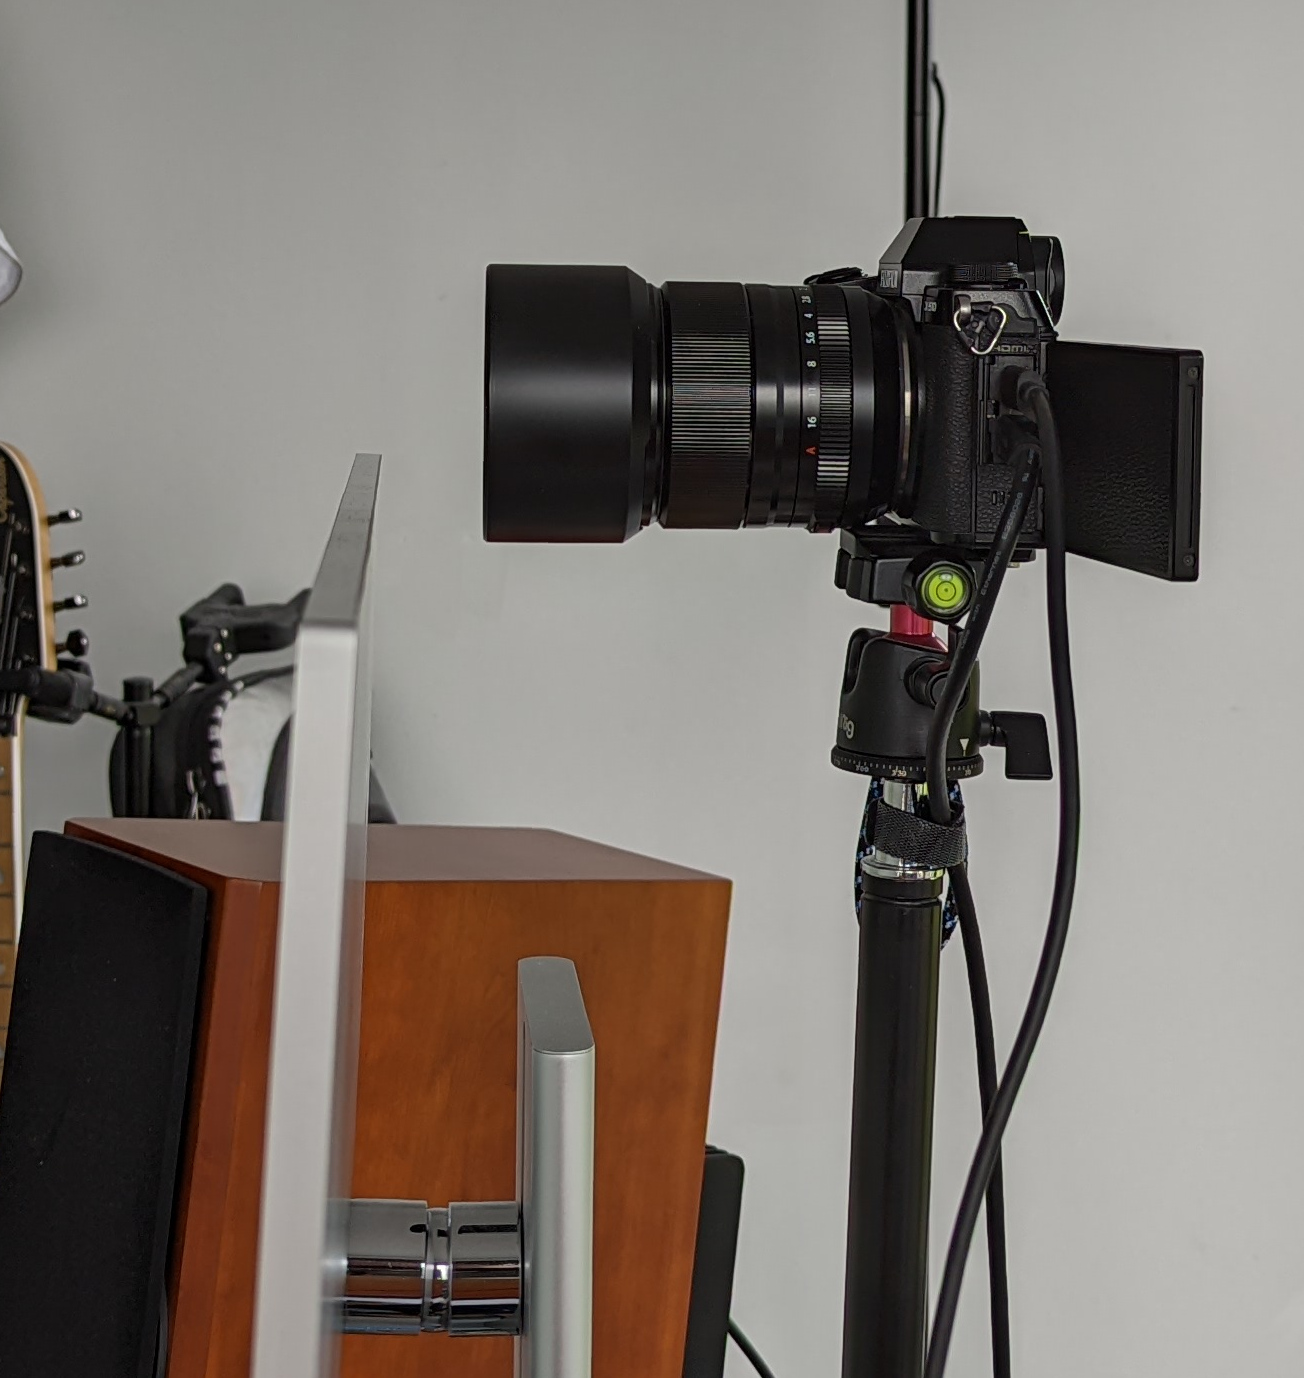
One needs to mount the camera somewhere and point it at you. Some people mount their camera side on but it feels odd to talk to the side of someone’s nose. I recommend mounting the camera directly in front of your face which, in general, means just behind and above your monitor. Here’s where I mount mine:
All modern cameras use the same 1/4“ mount hole, so pretty much any mount you buy will work with pretty much any camera. Some people use a tripod, but that tends to make the camera too low or, if adequately high, potentially wobbly.
Personally I use a “desk mount” which is a clamp that goes at the back of my desk. The particular model I use is no longer available but something like this mount is likely to do at least as good a job. The advantage of such a mount is that you can set the height once and forget about it: mine is absolutely rock solid. Here’s mine in action:
Wherever you mount your camera, I recommend minimising the distance between where your eyes naturally focus and the camera itself. My eyes naturally line-up with the top of my monitor, which is close enough to the camera that I naturally seem to be looking more-or-less at the other person much of the time. Sometimes, though, I have conversations with someone whose face is tiny and at the bottom of the screen. If I focus on their face it’ll seem to them that I’m looking down on them. To address this, I just move the entire videocon window upwards until their face is at the top of my screen — it’s crude but effective!
Connecting camera and computer
All modern cameras have a USB port of some description. Some can emulate the USB webcam standard, so all you have to do is plug a USB cable into your camera and computer, and away you go. Some don’t emulate this standard; and some, like my camera, emulate it but in a way which isn’t pleasant to use (mine uses a silly, distracting, focus mode; others do silly things like emulate a USB memory stick by default).
If, like mine, your camera doesn’t do well via USB, you can make use of the fact that modern cameras invariably have an HDMI output of some sort (generally “type D” or “micro” HDMI). One can then pair that with a cheap USB capture card as I do. Since most video conference software transfer 360p or 720p video, there’s no advantage to getting an expensive 4K capture card. Note that, depending on your camera, you might need to tell it to output a “clean” image7 via HDMI (without all the information photographers want on screen when taking photos): this is heavily camera dependent, but is normally a set-once-and-forget thing.
Running the camera
Finally, you need to actually get an image out of your camera. Modern cameras have a bewildering variety of settings, and, frankly, camera UIs are mostly awful. Fortunately, in most cases, you can get away with: checking that your lens is using its widest aperture; and setting the selector dial to the “movie” setting. On most cameras I’ve seen, you don’t even need to hit record8 to use the camera as a webcam!
Modern cameras have many additional settings (ISO, white balance, shutter speed etc.) which you can tweak if you want but, fortunately, they generally do a good job automatically. One area where you might want to make a tweak is the “colour” setting. In essence, camera sensors are less sensitive than our eyes, so they have to fudge converting the light they receive into the colours we expect. There is no one perfect setting: the colour conversion that’s best for a verdant valley might not be flattering for human skin. I’ve personally found that a subdued colour setting works best for a webcam. On Fujifilm, I use the “Eterna” colour profile which is similar to the typical cinema look. Unfortunately, what this setting is called, and the difference between settings, varies substantially by, and often within, manufacturer.
Summary
There are a few minor additional aspects I could have covered (e.g. latency or the susceptibility of some cameras to Moiré), but that’s too much detail for most people. As I’ve said several times, the good news is that modern cameras are increasingly made with video, and often webcam, use in mind which makes buying with confidence easier. Good luck — and I hope you’ll enjoy appearing more clearly to those you interact with!
Updated: (2022-05-17) JM Archer noted a fix to the issue I originally attributed to the ZV-1, making it an even better fit!
Acknowledgements: thanks to Lukas Diekmann, Dan Luu, and Chris Seaton for comments.
Footnotes
Perhaps surprisingly, phone cameras have an easier time of things. Indeed, they’re thick enough that one can do clever things like make parts of the camera at right angles to the outwards lens.
Perhaps surprisingly, phone cameras have an easier time of things. Indeed, they’re thick enough that one can do clever things like make parts of the camera at right angles to the outwards lens.
One can fiddle with the C920’s colour balance to lessen the Smurf effect — but most people don’t know that the setting exists nor, if they do, are they sure what to do with it.
One can fiddle with the C920’s colour balance to lessen the Smurf effect — but most people don’t know that the setting exists nor, if they do, are they sure what to do with it.
Most video conferencing systems default to 360p which is 480x360px — which isn’t enough pixels to express an even half-decent quality picture. Unless you’re in a very bandwidth constrained environment, I recommend forcing your upload to be 720p (1280x720px). Google Meet allows you to set this directly. There are plugins such as HD Camera Feed which can force 720p instead of 360p.
Most video conferencing systems default to 360p which is 480x360px — which isn’t enough pixels to express an even half-decent quality picture. Unless you’re in a very bandwidth constrained environment, I recommend forcing your upload to be 720p (1280x720px). Google Meet allows you to set this directly. There are plugins such as HD Camera Feed which can force 720p instead of 360p.
This is exacerbated by the fact that lots of photographers churn through equipment rapidly in the quest for perfection. The second hand market is, overall, a buyers market.
This is exacerbated by the fact that lots of photographers churn through equipment rapidly in the quest for perfection. The second hand market is, overall, a buyers market.
For example, my XF33mm f/1.4 lens is approximately equivalent to a micro four thirds 25mm f/1.1 or a full frame 50mm f/2.2. Just to make things more confusing, photographers tend to sometimes quote these numbers in “35mm” or “full frame” equivalents and sometimes not. I hope you can now see why I’ve stuck with APS-C numbers in this post!
For example, my XF33mm f/1.4 lens is approximately equivalent to a micro four thirds 25mm f/1.1 or a full frame 50mm f/2.2. Just to make things more confusing, photographers tend to sometimes quote these numbers in “35mm” or “full frame” equivalents and sometimes not. I hope you can now see why I’ve stuck with APS-C numbers in this post!
When cameras can’t get enough light, they have to amplify the signal they receive, which is controlled by the “ISO” setting. The higher the ISO, the greater the amplification. The greater the amplification, the “grainier” (or, my preferred term, the “noisier”) the image looks. Modern cameras do better at higher ISO levels than those of the past, but above ISO 1600 things tend to start looking gradually more unpleasant; I try and stick to ISO 800 or below which, with a wide aperture, is easy.
When cameras can’t get enough light, they have to amplify the signal they receive, which is controlled by the “ISO” setting. The higher the ISO, the greater the amplification. The greater the amplification, the “grainier” (or, my preferred term, the “noisier”) the image looks. Modern cameras do better at higher ISO levels than those of the past, but above ISO 1600 things tend to start looking gradually more unpleasant; I try and stick to ISO 800 or below which, with a wide aperture, is easy.
If you’re buying a slightly older second-hand camera, you should double check before purchasing that it really can output clean video. As far as I know, cameras from the past 5 or so years are unlikely to have any problems, but there are definitely a few cameras older than that which don’t support clean video output.
If you’re buying a slightly older second-hand camera, you should double check before purchasing that it really can output clean video. As far as I know, cameras from the past 5 or so years are unlikely to have any problems, but there are definitely a few cameras older than that which don’t support clean video output.
The X-S10 and, I think, many other cameras work in a low-power, moderate quality, mode if you don’t hit record — the quality of which is fine for an online meeting. If you use the higher-powered higher-quality mode, one can run into over-heating problems: some cameras can only manage 10-20 minutes before they turn themselves off!
If I’m recording a high quality video in 4K, my X-S10 will start becoming unhappy about heat after about 30 minutes and from memory shuts down a little shy of an hour. Fortunately, minimal airflow allows it to run for hours even at this highest setting. In such cases, I tie a Noctua USB fan (from memory this model) to my camera with the included “low voltage” cable so that it rotates incredibly slowly – so slowly that I have to manually start the fan rotating! — and thus silently (I can only hear the fan if I put my ear a few inches away). Cameras are improving in this regard so, increasingly, this isn’t an issue. I believe that many Sony cameras, for example, can run indefinitely without overheating, even in their highest quality setting.